Containers
Containers are an important foundation for your application in building a Trusted Software Supply Chain. You want a secure and blessed golden container image that your application will inherit security controls from.
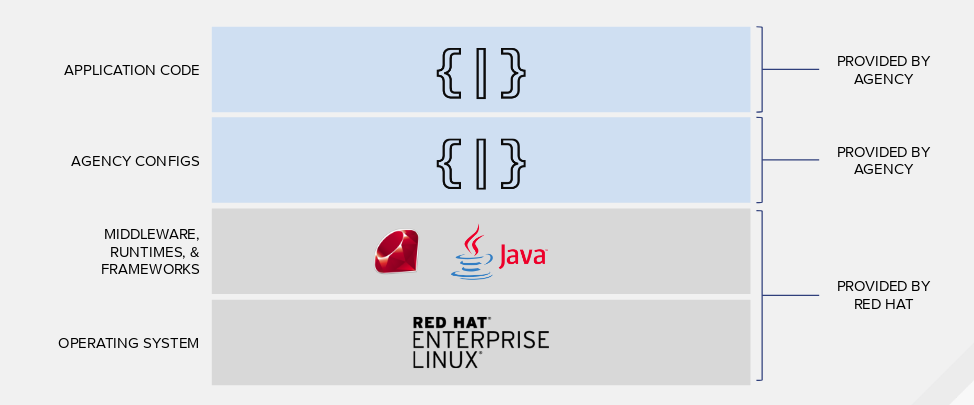
Containers are built using a layered approach. For example, to create a container of a Java web application, you could do so in multiple layers: the OS, the JVM, the web server, and the code itself.
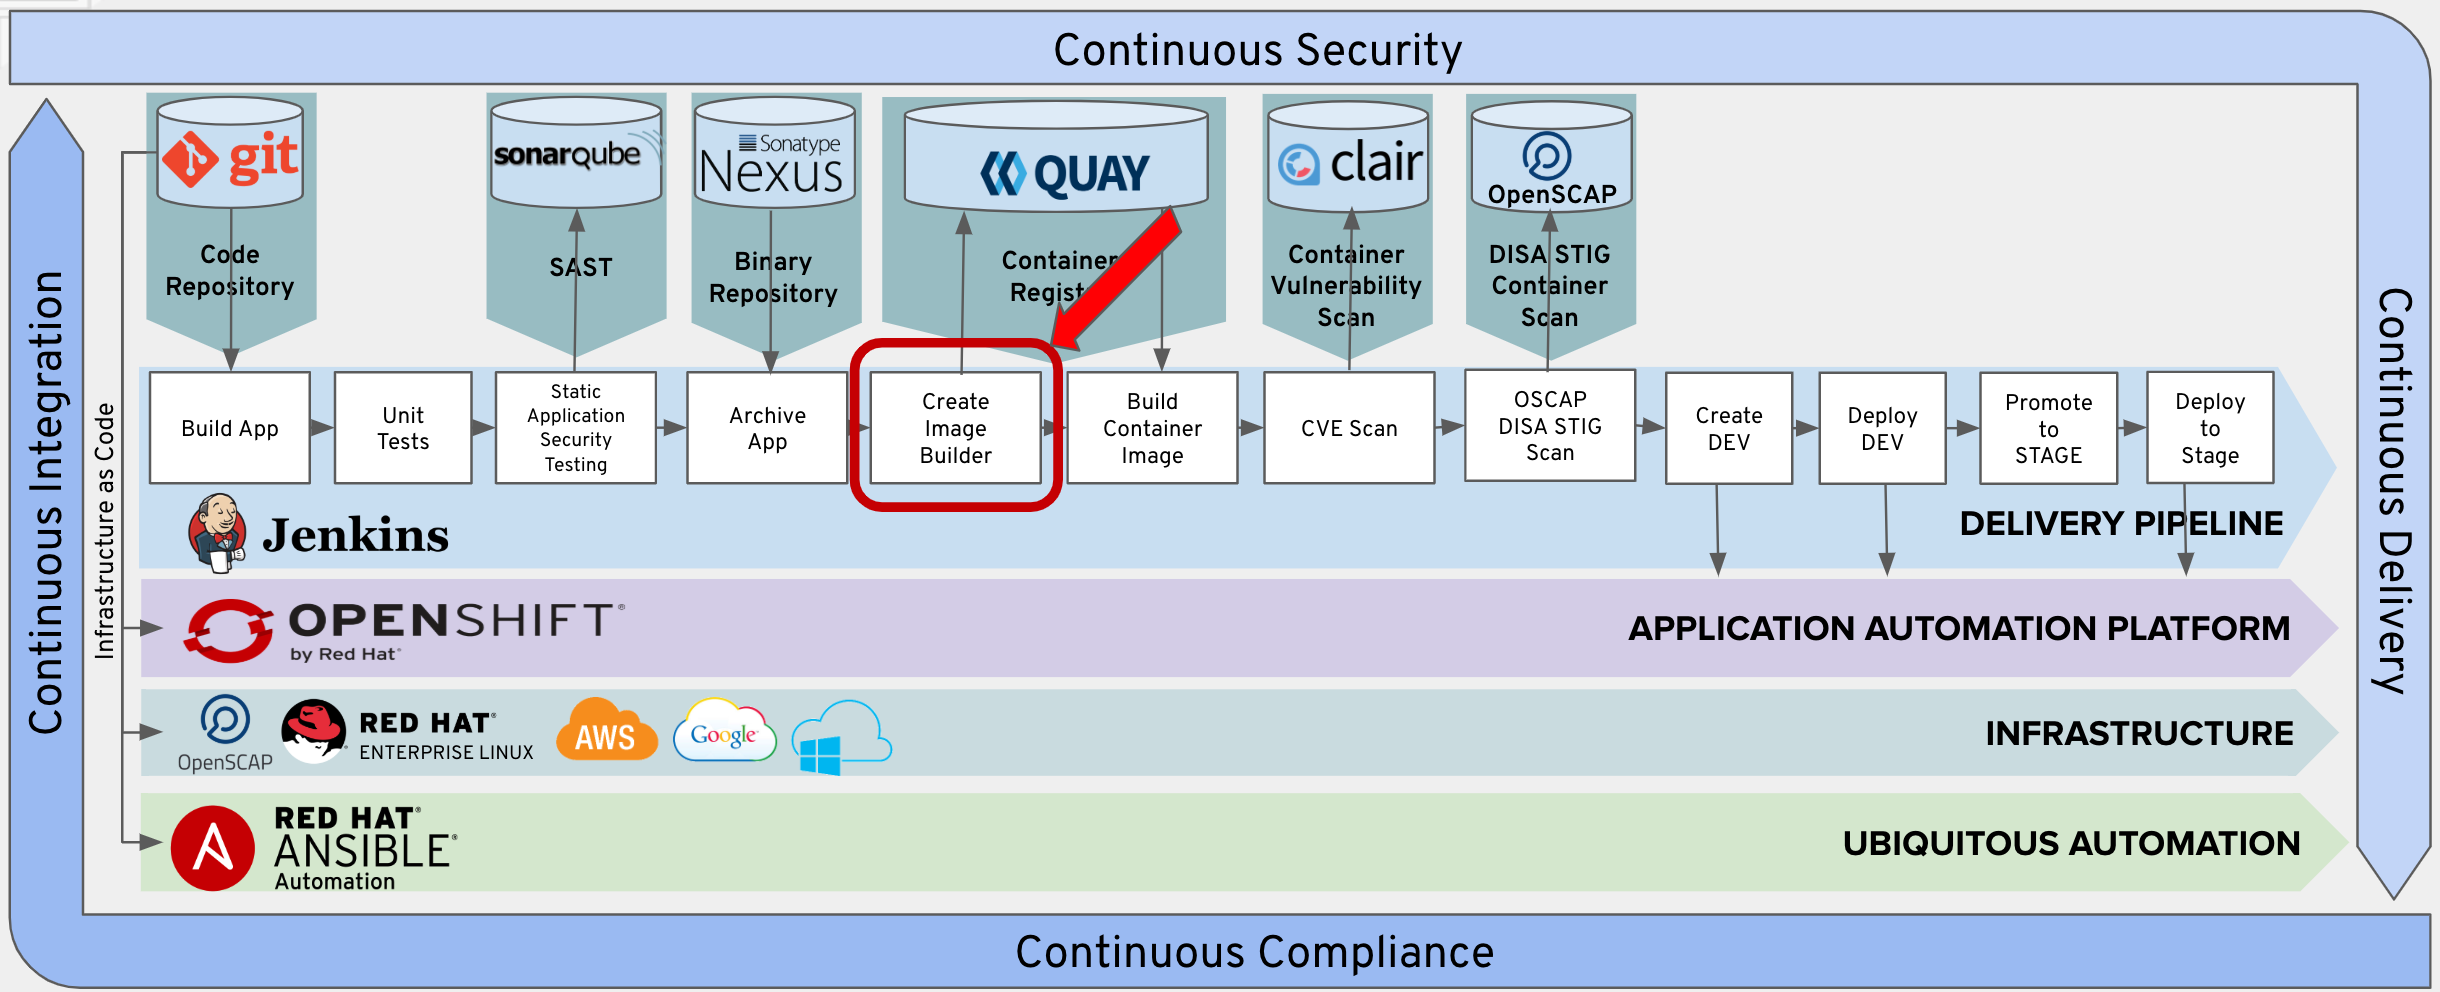
We can incorporate CVE and vulnerability scanning against images in an automated fashion. Any image change is scanned to improve the inherited security of your application. We have partners such as Black Duck and Twistlock that do container image scanning. Also, as a result of Red Hat’s acquisition of CoreOS, we now offer Quay as an enterprise-grade registry that does vulnerability scanning.
We can also cryptographically sign your image so you know your container is running with a verified container image.
# Start with Quality Parts
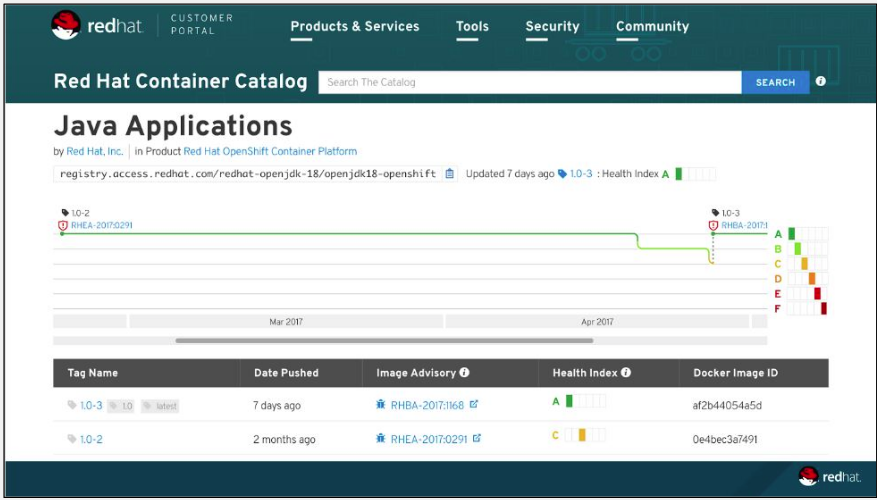
Red Hat has a container registry that provides certified Red Hat and third-party container images that will be the foundation of your container images. Our Registry also has a health index of the image so you know the state of the image.
# Add Create Image Builder Stage
Next we will add the Create Image Builder Stage into your pipeline.
This step will create a new build. We will be leveraging a trusted JBoss EAP 7 container.
The golden image will will be using for our applications is jboss-eap70-openshift:1.5. Again, you’ll want a hardened, secured, patched and up to date container image as a foundation for your application.
# Append to Jenkins Pipeline Configuration
In Builds > Pipelines > tasks-pipeline > Actions > Edit

Append the text below to the bottom of the Jenkins Pipeline Configuration. Please make sure to append to the beginning of the next line.
    stage('Create Image Builder') {
      when {
        expression {
          openshift.withCluster() {
            openshift.withProject(env.DEV_PROJECT) {
              return !openshift.selector("bc", "tasks").exists();
            }
          }
        }
      }
      steps {
        script {
          openshift.withCluster() {
            openshift.withProject(env.DEV_PROJECT) {
              openshift.newBuild("--name=tasks", "--image-stream=jboss-eap70-openshift:1.5", "--binary=true")
            }
          }
        }
      }
    }
Test Your Pipeline
If you’d like to do a test of first pipeline stage, add the following brackets at the end of your Jenkinsfile. Make sure to append to the beginning of the last line.
  }
}
Save your Jenkinsfile.
Go back to Builds > Pipelines
Click Start Pipeline
Delete Brackets
Please delete the brackets you just added once testing is complete. We can add them later if you’d like to test your pipeline as you go along.
  }
}
Click Save
Workshop Details
| Domain |
|
|
| Workshop | ||
| Student ID |
Workshop Details
| Domain |
|
|
| Workshop | ||
| Student ID |