Working With Block and Object Storage in OpenStack
Block Storage is Handled by Cinder
The OpenStack Block Storage service works through the interaction of a series of daemon processes named cinder-* that reside persistently on the host machine or machines. You can run all the binaries from a single node, or spread across multiple nodes. You can also run them on the same node as other OpenStack services.
To administer the OpenStack Block Storage service, it is helpful to understand a number of concepts. You must make certain choices when you configure the Block Storage service in OpenStack. The bulk of the options come down to two choices - single node or multi-node install. You can read a longer discussion about Storage Decisions in the OpenStack Operations Guide.
OpenStack Block Storage enables you to add extra block-level storage to your OpenStack Compute instances. This service is similar to the Amazon EC2 Elastic Block Storage (EBS) offering.
Object Storage is Handled by Swift or Ceph
OpenStack Object Storage service provides software that stores and retrieves data over HTTP. Objects (blobs of data) are stored in an organizational hierarchy that offers anonymous read-only access, ACL defined access, or even temporary access. Object Storage supports multiple token-based authentication mechanisms implemented via middleware.
Applications store and retrieve data in Object Storage via an industry-standard HTTP RESTful API. Back end components of Object Storage follow the same RESTful model, although some APIs, such as those managing durability, are kept private to the cluster. For more details on the API see the OpenStack Storage documentation.
In this workshop environment, Object Storage is configured to use Ceph RadosGW.
Let’s begin working with Block Storage
Navigate to Volumes -> Volumes using the second level navigation tabs
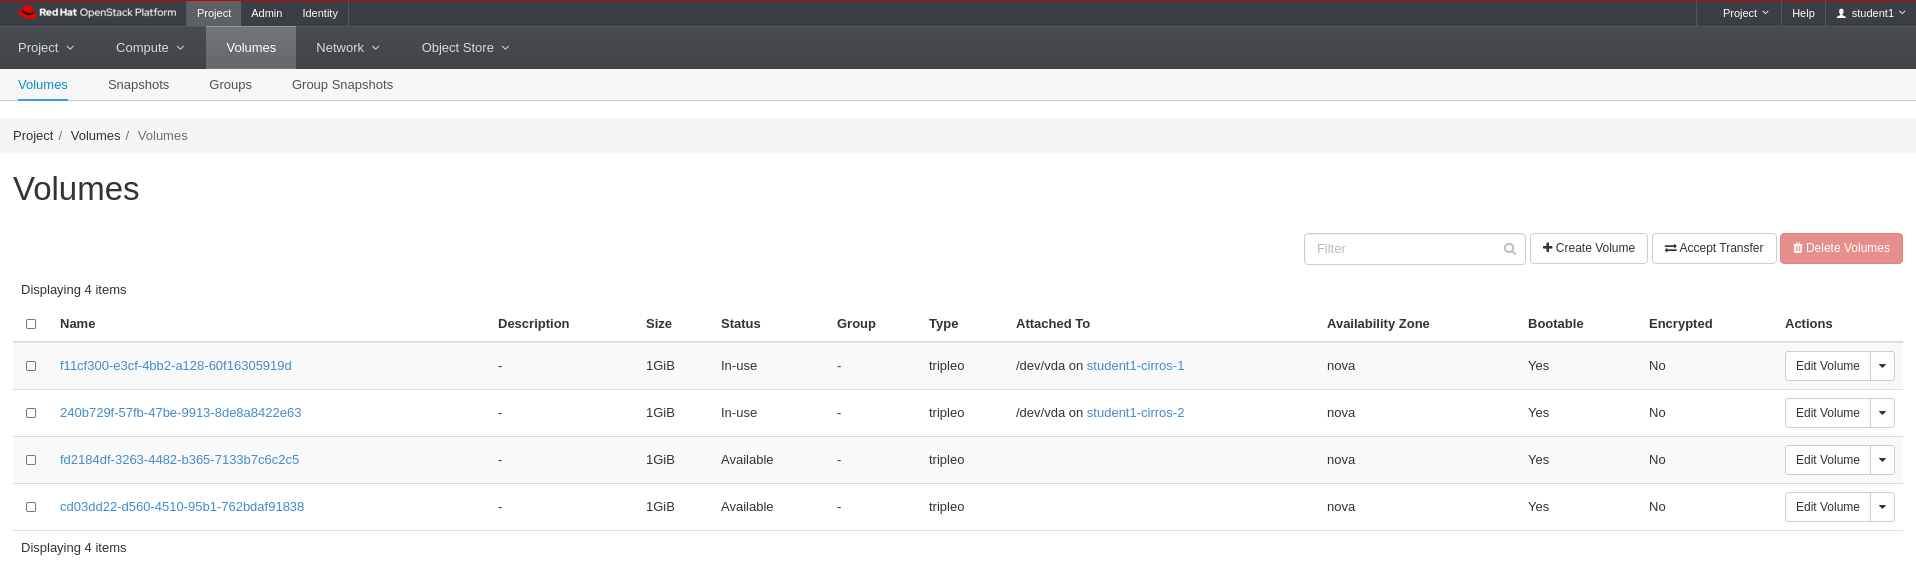
Lab 9 Figure 1: Volume Listing
Click Create Volume on the right hand side of the screen
Enter student1-vol-1 for Volume Name
Leave Description empty
Leave Volume Source and Type as they are
Enter 15 for Size (GiB)
Leave Availability Zone as is
Click Create Volume
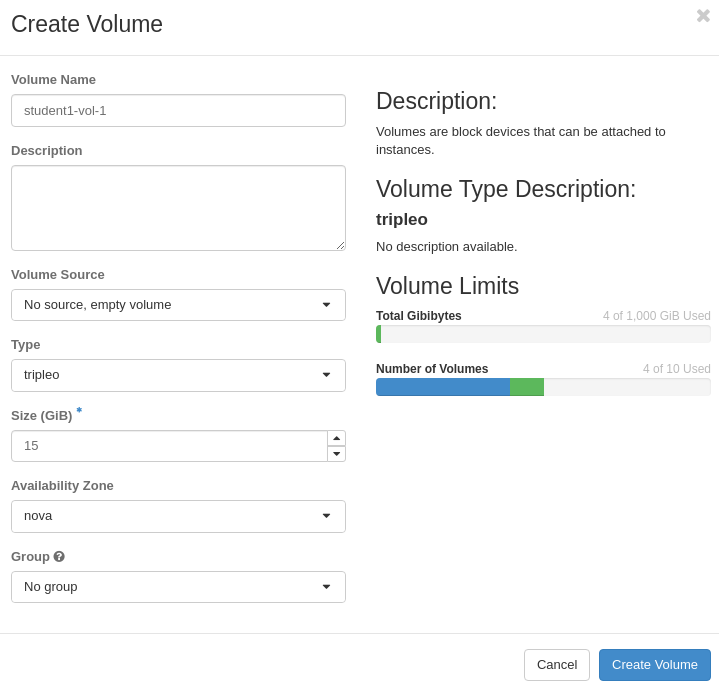
Lab 9 Figure 2: Create Volume
You should see an info box appear in the upper right corner of the screen that says something similar to ‘Info: Creating volume “student1-vol-1”’
If you did not, let the intstructor know now

Lab 9 Figure 3: New Volume Created in Project
On the volume listing row for student1-vol-1, Click the down arrow on the far right hand side of the row
Click Manage Attachments
Select student1-cirros-1 from the Attach to Instance drop down
Leave Device Name as is
Click Attach Volume
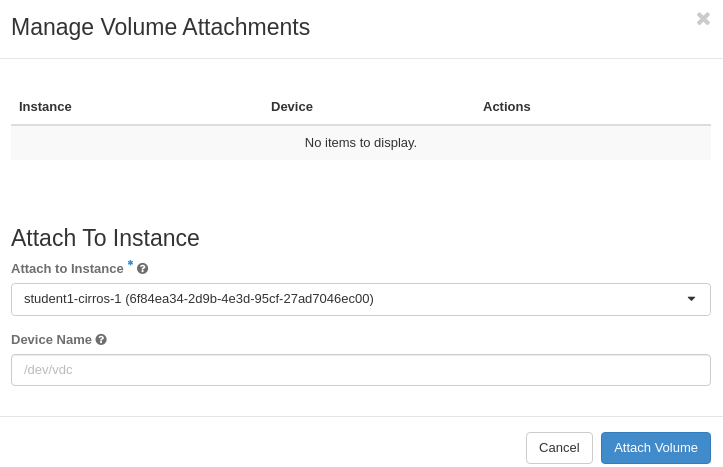
Lab 9 Figure 4: Attach Volume to Instance
You should see an info box appear in the upper right corner of the screen that says something similar to ‘Info: Attaching volume student1-vol-1 to instance student1-cirros-1 on /dev/vdb.’
If you did not, let the intstructor know now

Lab 9 Figure 5: New Volume Attached to Instance in Volume Listing
You should now have an active volume in your volume listing and it should be attached to your student1-cirros-1 instance.
If you do not, let the intstructor know now
Now Let’s Learn About Object Storage
Navigate to Object Store -> Containers using the second level navigation tabs
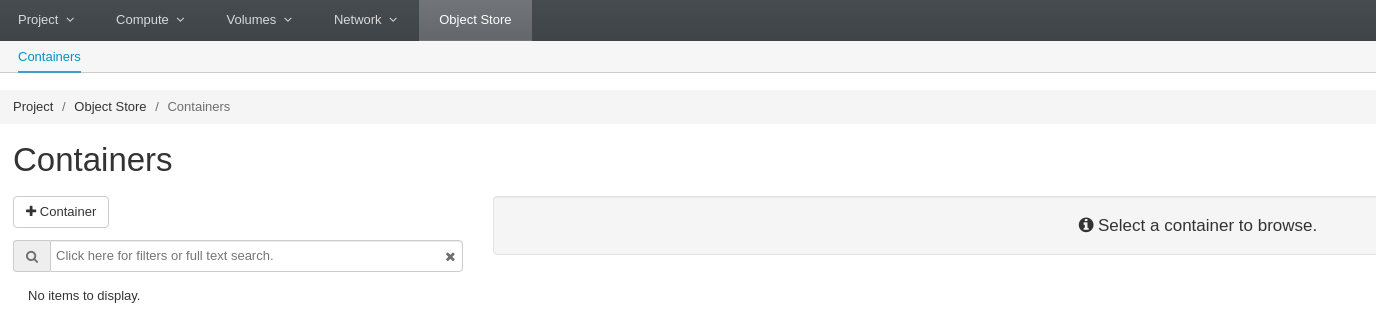
Lab 9 Figure 6: Object Store Container Listing
Click + Container on the left hand side of the screen
Enter student1-container for Container Name
Leave Not Public under Container Access selected
Click Submit
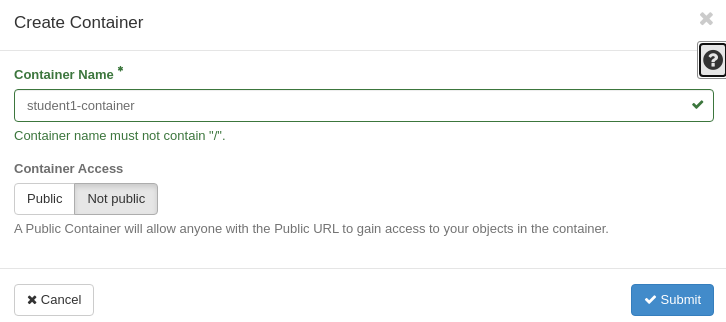
Lab 9 Figure 7: Create Container
You should see an info box appear in the upper right corner of the screen that says something similar to “Success: Container student1-container created.”
If you did not, let the intstructor know now

Lab 9 Figure 8: New Container Created in Object Store
Click on the student1-container button on the left hand side of the screen
Click on the upload button to the right of the Filter search box
The upload button looks like a folder with an up arrow

Lab 9 Figure 9: Select Container in Object Store
Click the Choose File button
Select any small image, text file, pdf, etc. from your device
Leave File Name as is
Click Upload File
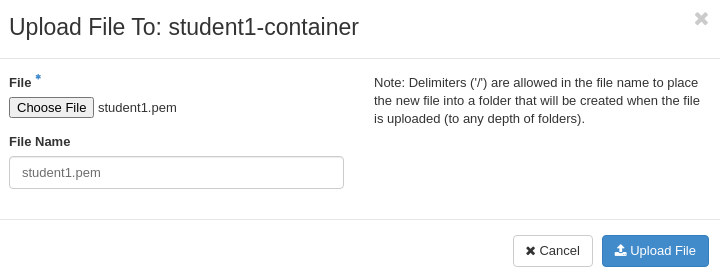
Lab 9 Figure 10: Upload Form for Adding File to Container
You should see an info box appear in the upper right corner of the screen that says something similar to “Success: File student1.pem uploaded.”
If you did not, let the intstructor know now

Lab 9 Figure 11: New Object in Container Listing
Summary
We have just touched the surface of what can be done with storage in this lab. The storage layer in OpenStack is extremely flexible and well developed.
Note that production deployments should always use a shared storage platform as the underpinnings for the OpenStack Storage services.
There is a third storage type that we did not go through in this lab. That is File Share-as-a-Service. Manilla is the OpenStack project name for this service and it is a supported project in Red Hat OpenStack Platform.
In our next lab, we will conclude with a few resources for your continued learning.
Workshop Details
| Domain |
|
|
| Student ID | ||