Source to Image (S2I)
One of the useful components of OpenShift is its source-to-image capability. S2I is a framework that makes it easy to turn your source code into runnable images. The main advantage of using S2I for building reproducible docker images is the ease of use for developers. You’ll see just how simple it can be in this lab.
Let’s build a node.js web app, using S2I
We can do this either via the command line or the web console. You decide which you’d rather do and follow the steps below.
Note: When using the CLI, OpenShift automatically detects the source code type and select the nodejs builder image.
Terminal access
http://workshop-terminal-terminal-YOUR#.apps.example.redhatgov.io
Goto the terminal and type the following:
$ oc project demo-YOUR#
$ oc new-app --name=dc-metro-map https://github.com/RedHatGov/openshift-workshops.git --context-dir=dc-metro-map
$ oc expose service dc-metro-map
Web Console access
https://console-openshift-console.apps.example.redhatgov.io
Click "Developer" profile", "+Add", and "Import from Git (under Git Repository)"
Fill out the "Git Repo URL" field as follows:
| Git Repo URL | https://github.com/RedHatGov/openshift-workshops.git |
| Git type | GitHub |
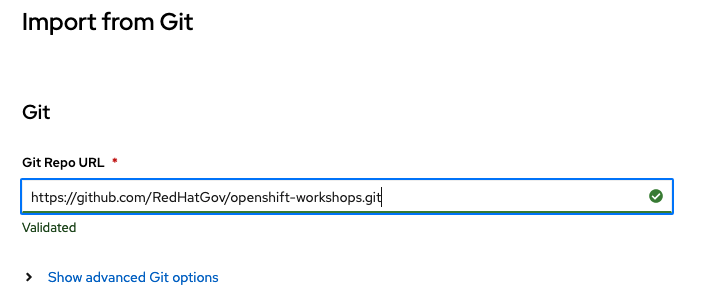
Ensure that the repository is validated (as shown above)
Click on the "Show advanced Git options" expender

Fill out the "Context Dir" field as follows:
| Context Dir | /dc-metro-map |
Fill out the fields, under "General" as follows:
| Application name | dc-metro-map |
| Name | dc-metro-map |
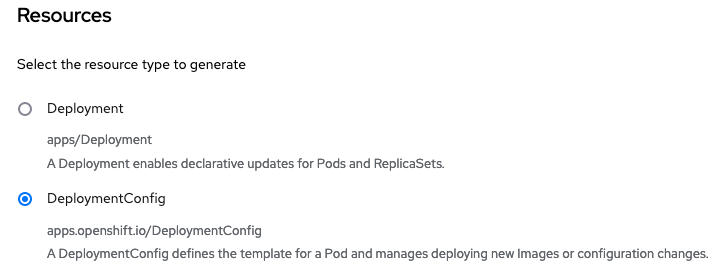
Choose "DeploymentConfig"
Scroll to the bottom and click "Create"
×
Workshop Details
| Domain |
|
|
| Workshop | ||
| Student ID |
Workshop Details
| Domain |
|
|
| Workshop | ||
| Student ID |